Learn how to execute test runs at TestLodge by watching this short video. Discover how test runs can be performed in a number of ways and see how the overview screen keeps you in the loop with all your progress and results.
Video Transcription
Hey. So in the prior video, we looked over a few variations on creating Test Runs. Now I want to show you how to execute them and subsequently what Reports are available. Let’s get to it!
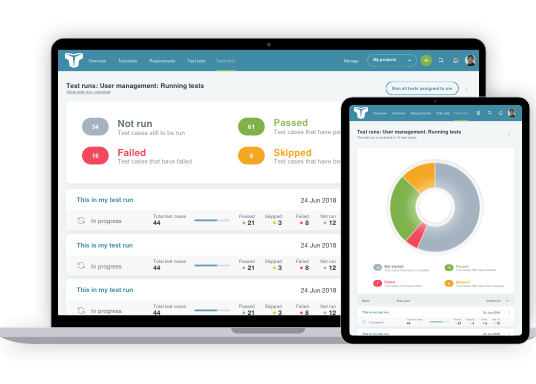
So, first, we’ll see the Overview screen, which is shown once you’ve created a Test Run or when you choose to view an existing run. This gives you an instant insight into the progress and the results. You’ll be able to see the overall status of the Test Run, as well as the status of each collection of tests, all of which are broken down into the Test Suites and any test configurations that you selected.
Executing tests can be done in several ways. When you have been assigned incomplete tests within a Test Run, the ‘Run Assigned Tests’ button is shown. Selecting this will direct you to all tests that were assigned to you in the order they were added. You might want to run the tests according to the Test Suite or Test Configuration. The option to do this can be found next to each collection of tests. Or alternatively, you might simply want to run all tests within the test run in the order that they were added; that’s all good.
When running tests, you’ll be guided over each individual case, which allows you to select a result of either ‘Pass,’ ‘Fail’ or ‘Skip.’ Additionally, you might choose to provide actual results or even upload images if the result is different from what was expected. If you’ve integrated with an issue tracking tool, Testlodge can automatically raise a defect if the test fails. You can then choose to display additional issue tracker options before failing the ticket, but we’ll go into this in greater detail in the next video.
If you return to the Test Run Overview screen, you’ll see the progress of the Test Run. From here, you can re-assign users to different groups of tests simply by clicking the user’s avatar and selecting them from the dropdown. At any stage during the run, you can stop and come back at a later date to restart from the point it was left.
At the top of the screen, you’ll see some additional tabs. Clicking the ‘Assigned People’ tab, will give you an overview of all people involved in the run, along with their progress. If you click on the ‘Individual Cases’ tab, you’ll be shown every single test that’s included in the run, as well as the option to edit the result, expand the test details and view any issue tracker tickets. These Test Cases can also be filtered.
You can choose to re-run tests based on their result at any point during or after the Test Run. You could choose to re-run all failed tests once you’ve been informed that all issues have been resolved. To do this, choose the ‘re-run tests’ option and select your re-run criteria.
There’s also the usual option for exporting the test run along with viewing reports related to this individual run, such as the requirements report.
Let’s look at other reports that are available. There are several reporting options for both a single run and all runs within a project.
Under the Test Runs tab, you’ll find the reports dashboard called ‘Reports and Charts.’ Here you can clearly see the status of test runs performed over the week, details of how many incomplete runs there are, then dropping down, you’ll see several reports.
The Test Run results report; this allows you to report on a single or multiple Test Runs, either by searching by the date created or just manually by selecting individual Test Runs. This report can also be easily accessed whilst viewing a single run too. Once generated, the report will give a quick overview of all tests and key statistics, such as completion rate, along with the ability to view individual tests grouped by their result.
Finding trends in your testing process is always important, and TestLodge can help you with this in the form of the ‘Common Case Results Report.’ This report allows you to instantly see which Test Cases have been passed, failed, and skipped the most. You can filter these by date range or by manually selecting the Test Runs you want to report on. Expanding each case will show you when the Test Run was executed, along with any configuration such as which web browser was used.
So what about keeping track of your team, so you know what they’re all working on? No problem, it’s easy. The ‘User Workload Report’ allows you to view everyone who has incomplete tests assigned to them, which means you can see who may need some help and who’s likely to be free to start further testing. As with the other reports, you can choose to view additional information for each person.
And that’s it for executing your Test Runs and viewing Reports; it’s that simple. Want to know more about issue tracker functionality and integration? Then check out the next video, and I’ll show you what Testlodge can offer.