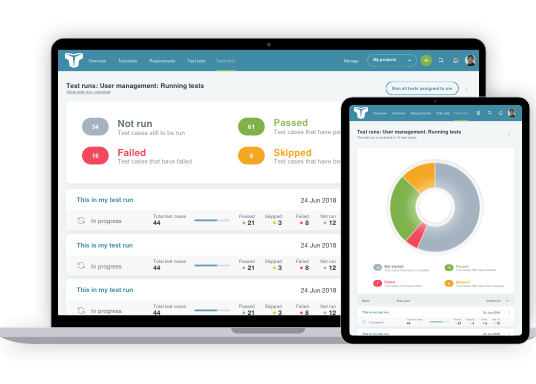
Learn how to create a test run in this short video. You will also find out how to include multiple test suites in a run or use just an individual test case. If you want to designate one person or several to be involved in single or multiple test runs, the video will show you how to do this too.
Video Transcription
So you’re looking to create a Test Run? Cool, this quick overview will show you how. Test Runs are created when you want to execute your Test Cases, generate them from either one Test Suite assigning a single person, or create more from numerous suites and assigning multiple people, along with the ability to define test configurations to suit your needs.
Let’s look at creating a Test Run using both of the approaches.
Executing all Test Cases in a single Test Suite that requires only one person can be approached by creating a Quick Run. This can be done by selecting the ‘Test Suite’ tab and clicking the ‘Run Test Suite’ option for the suite you want to execute.
From here, you’ll be shown a lightbox; this allows you to alter the title of the Run and optionally assign it to a single person. If you want to include more than one suite, there’s an option to ‘Modify This Test Run’ that’ll allow you much more control. We’ll look over this function in more detail in a minute.
Click ‘Create Test Run,’ and a new run will be created with all the cases included. You’ll then be taken to the Test Run overview screen. If you have assigned someone to perform this Test Run, they’ll receive an automatic notification of this. When you or the assigned tester are ready, you can click ‘Run All Tests’, and you’ll be guided over each Test Case in turn.
If you want to include multiple test suites, choose individual test cases, or have multiple people involved in a single Test Run, all these options are possible.
Under the ‘Test Runs’ tab, create a new test run, name it, then press ‘Select Test Suites and Cases.’ You’ll now be able to see a list of all test suites that you might want to include. Let’s search and select a couple.
This works just as easily for selecting individual test cases. You can search by the case title or associated test suite, as well as by any custom fields that you may have setup. We’ll select a couple of individual cases here.
Finally, you can choose to view only the suites and cases you have selected, which lets you see what will be included in your run with the option of deselecting any that you no longer want to include.
Each suite provides us with a range of options. Move suites into your preferred order for execution or remove any that are no longer needed. There are also choices in the drop-down menu for selecting individual test cases from a suite instead of including them all and to assign each suite to a different user.
Selecting a test configuration link from the menu means that we can run each set of cases multiple times for things like web browsers or operating systems. For this Test Suite, we’ll choose to run our test on two operating systems and two browsers. The ‘selected’ tab in the lightbox will show the combinations and enable you to exclude any that are not relevant, along with assigning each combination to a different person.
If we click ‘Create Test Run,’ our Test Run will be created, and we’ll be shown all the selected Test Suites and test configuration sections that are generated, with the option to run each one or all that are assigned to you. As we said before, any user that’s included in the Test Run will be notified.
If we wanted to run all Test Cases associated with a Test Plan, requirement document, or just a single requirement, this can also be done pretty quickly. Just find the suitable content (for this example, we’ll choose a Requirement Document), and by selecting ‘Run Associated Cases,’ TestLodge will automatically fill in the new run form with the associated suites and cases.
So that’s it for creating a new Test Run. We’ve even seen a variety of ways to go about it. Stick with us as we’ll be going into more detail on the functionalities of Test Runs as well as Reports in the next video.
